Getting started
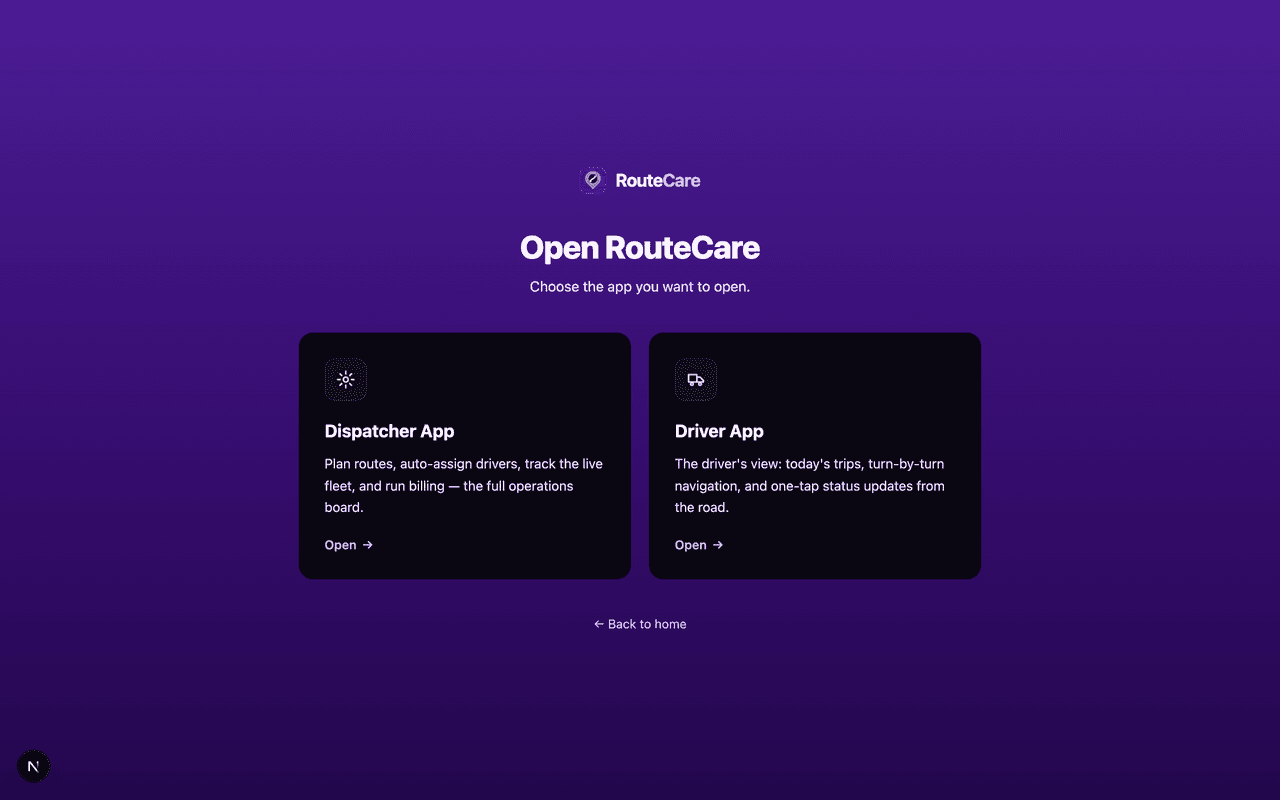
RouteCare is one app with two sides: the Dispatcher app (planning, tracking, billing) and the Driver app (the driver’s phone). From the homepage, choose which one to open and sign in.
- Go to your RouteCare web address and click “See the live demo” (or “Sign in”).
- On the “Open RouteCare” screen, choose Dispatcher App or Driver App.
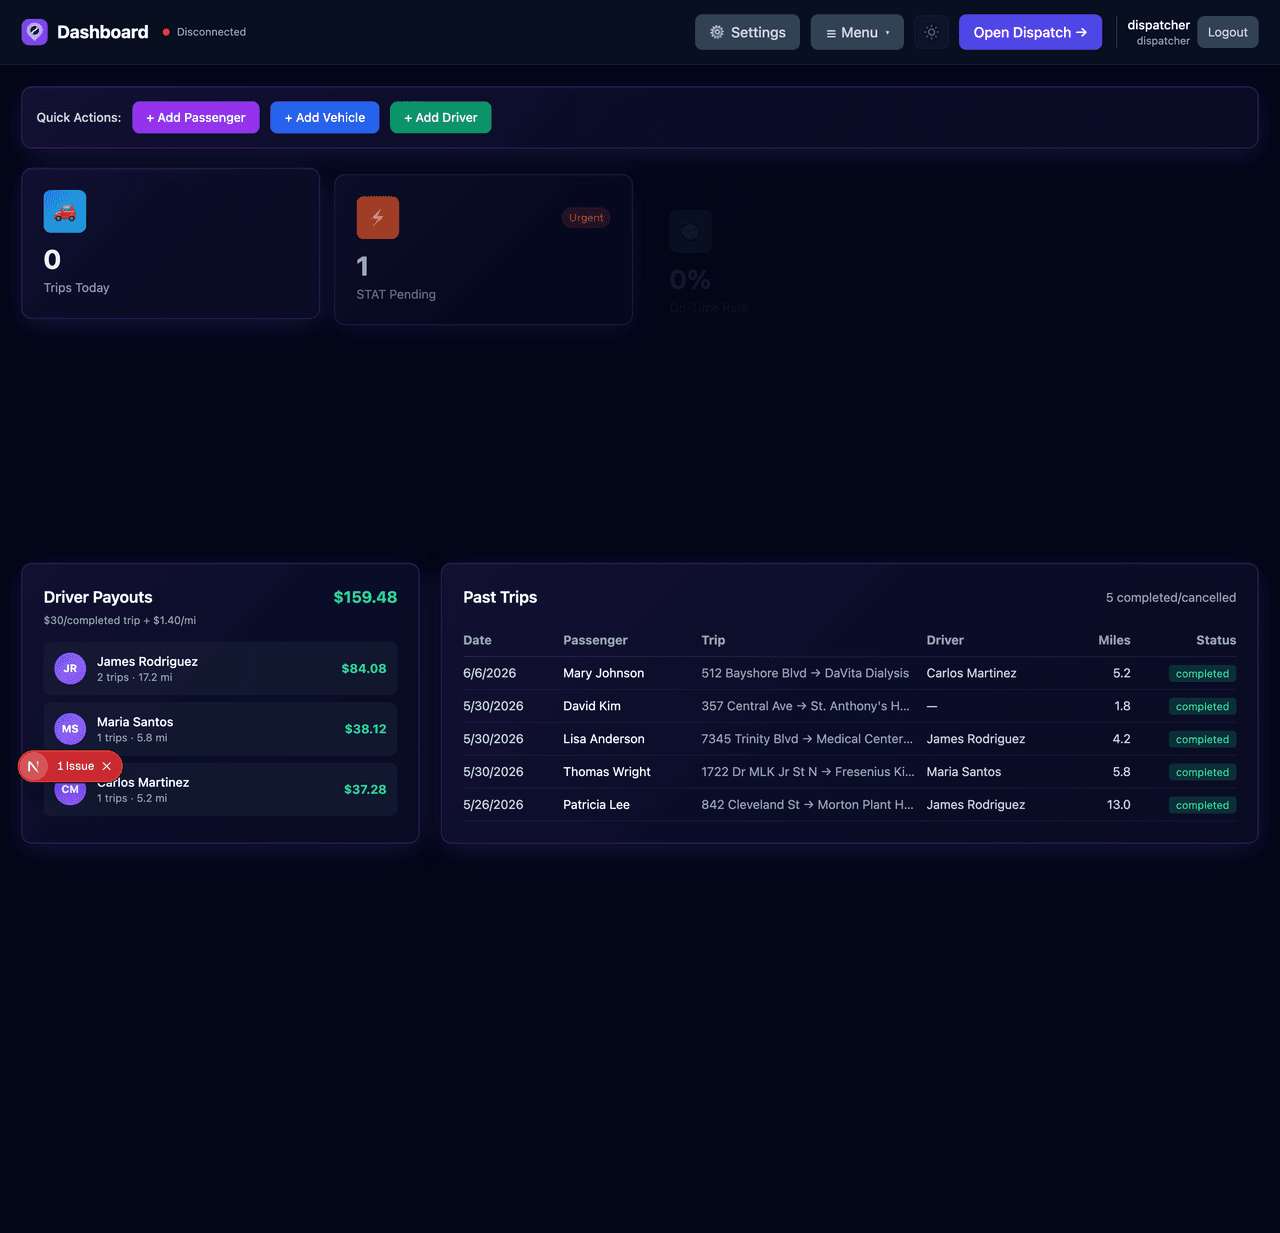
- Sign in with the email and password your admin set up. Dispatchers land on the Dashboard; drivers land on their trips.
Adding & scheduling trips
Add a trip with a pickup time and the all-important appointment (drop-off) time. You can also book a round trip in one step.
- From the Dispatch board, click “+ Create Trip” (or use Quick Actions on the dashboard).
- Pick the passenger, type the pickup and drop-off addresses (they auto-complete and geocode).
- Set the Pickup Time and the Appointment Time — the appointment time is when the patient must be dropped at the doctor.
- Choose the trip type (appointment, dialysis, discharge), priority, and optionally assign a driver.
- To book a return, check “Round trip — add a return leg (back home)” and choose Will-call (driver returns when the patient is ready) or a Scheduled return time.
- Click Create Trip. The trip drops into the dispatch queue, ready to route.
Dispatching & routing
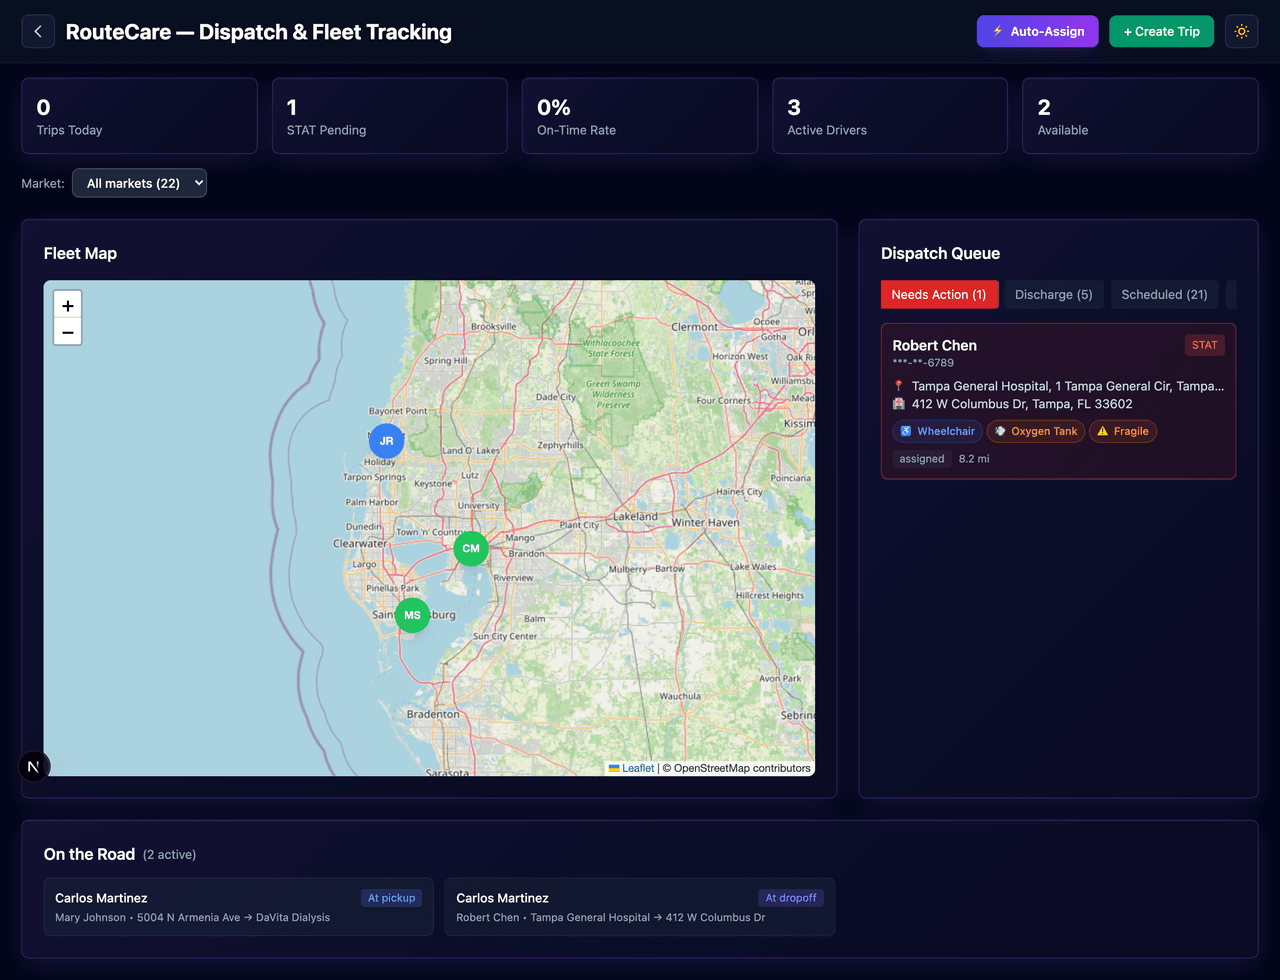
The Dispatch board shows everything that needs action. Assign drivers by hand, let auto-assign match open trips, and watch drivers on the live map.
- Open Dispatch from the dashboard. Unassigned and priority (STAT) trips surface first in Needs Action.
- Use the Market dropdown to focus on a service area, or search clients by name or phone.
- Click a trip to see details, ranked driver suggestions, and No-Show / Cancel / Undo controls.
- Use Auto-Assign to fill open trips for the selected market, or assign the top recommended driver by hand.
- Round-trip and will-call legs are tagged so you can see returns at a glance. Active trips also appear in On the Road.
- Open Routes from the nav to see each driver’s day in time order with total miles and drive time.
Bulk importing broker manifests
Use Import Manifest when a broker sends a spreadsheet. RouteCare reads common CSV and Excel manifests, maps the columns, geocodes addresses, and creates routable trips.
- From Dispatch, click “⬆ Import Manifest” (also under More → Import in the nav).
- Upload the .csv, .xlsx, or .xls file. RouteCare auto-detects the header row and matches fields like passenger, pickup, drop-off, time, phone, mobility, pay, mileage, and trip number.
- Check the Service date. Broker files often contain only times, so RouteCare anchors pickup and appointment times to that date.
- Review the column matches and preview. Adjust any dropdown that looks wrong before importing.
- Click Import. RouteCare links A/B round-trip legs, marks will-call returns, uses broker trip numbers to avoid duplicate re-imports, and skips assigned or in-progress trips instead of overwriting live work.
AI Trip Picker
For organizations with the AI Dispatcher add-on, the AI Trip Picker helps decide which broker portal trips are worth taking before you import them.
- Open Dispatch and click “✨ AI Trip Picker” if it is enabled for your organization.
- Paste the broker portal trip list as text, or paste / attach up to four screenshots.
- Click “Analyze trips.” RouteCare reads the trips and marks each one Take, Review, or Skip with short reasons.
- Take trips are selected automatically. Check or uncheck rows, then click “Import selected.”
- After importing, accept the same trips in the broker portal so the broker assignment matches RouteCare.
- Admins can tune the picker in Settings → AI Trip Picker with service radius and minimum $/mile. Distances are based on drivers’ latest GPS positions.
The driver app
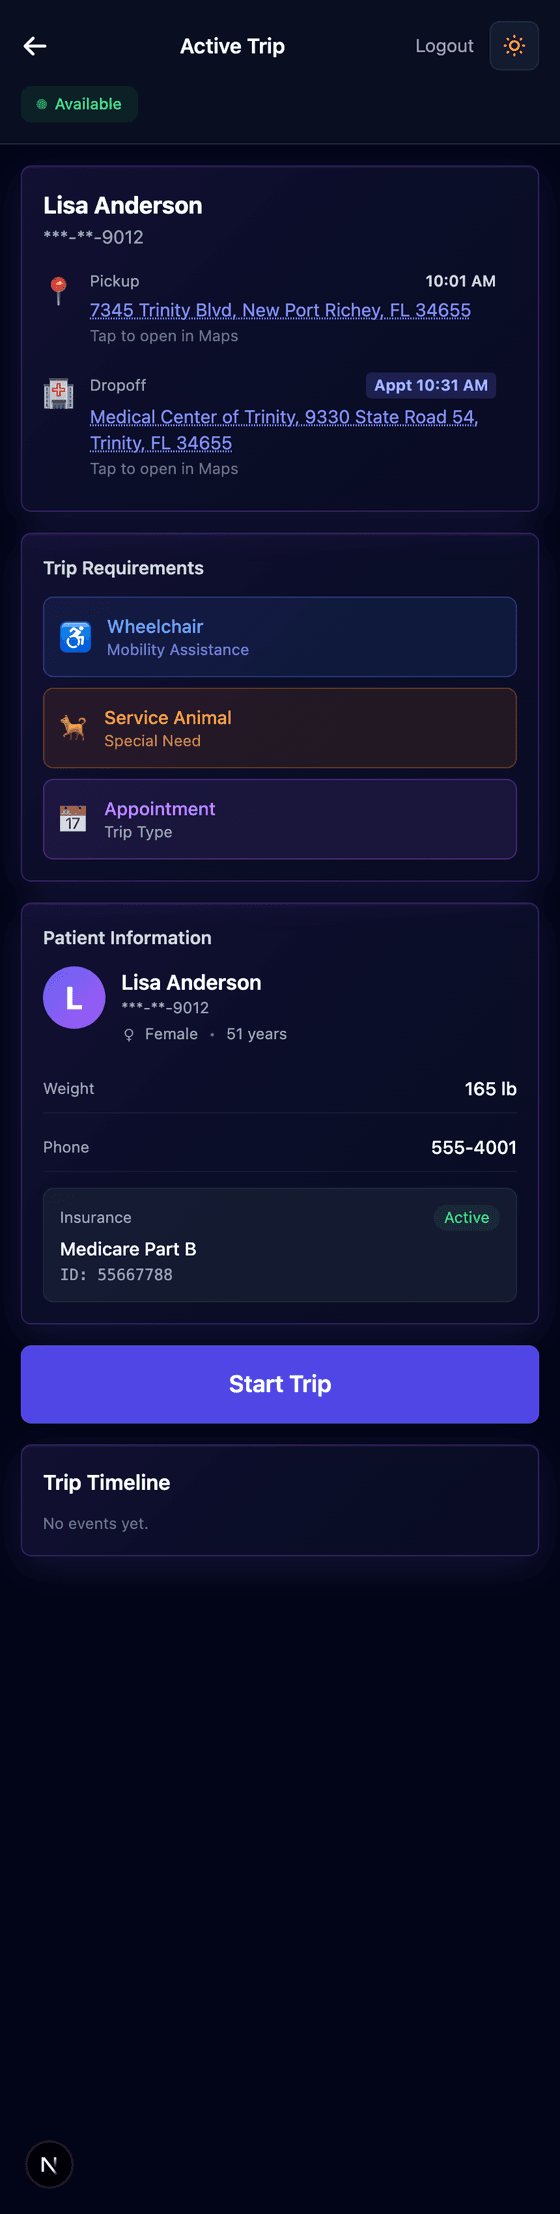
Drivers sign in on their phone and see their day. Each trip shows the date, pickup time, and the appointment (drop-off) time front and center.
- Driver opens the app, chooses Driver App, and signs in (or joins with an invite code the first time).
- If the driver installs RouteCare on their phone, the Driver app uses its own home-screen icon and opens straight to /driver.
- The Active trip shows the patient, pickup and drop-off with one-tap navigation, requirements, and the appointment time.
- Drivers can mark themselves Available or On Break. While available or on a trip, the phone shares live GPS so dispatch can see the driver on the map.
- Advance the trip with the buttons: Start Trip → Arrived at Pickup → Picked Up → Arrived at Drop-off → Confirm & Sign.
- During pickup, if the patient doesn’t come out, slide to mark No-Show or Cancel (slide-to-confirm avoids accidental taps). A mistake can be undone from the Completed tab.
- Will-call returns appear in a banner with “Start pickup” once the patient is ready; starting one texts the rider that the driver is on the way.
- GPS is captured at drop-off as proof for the broker.

Driver schedule & future routes
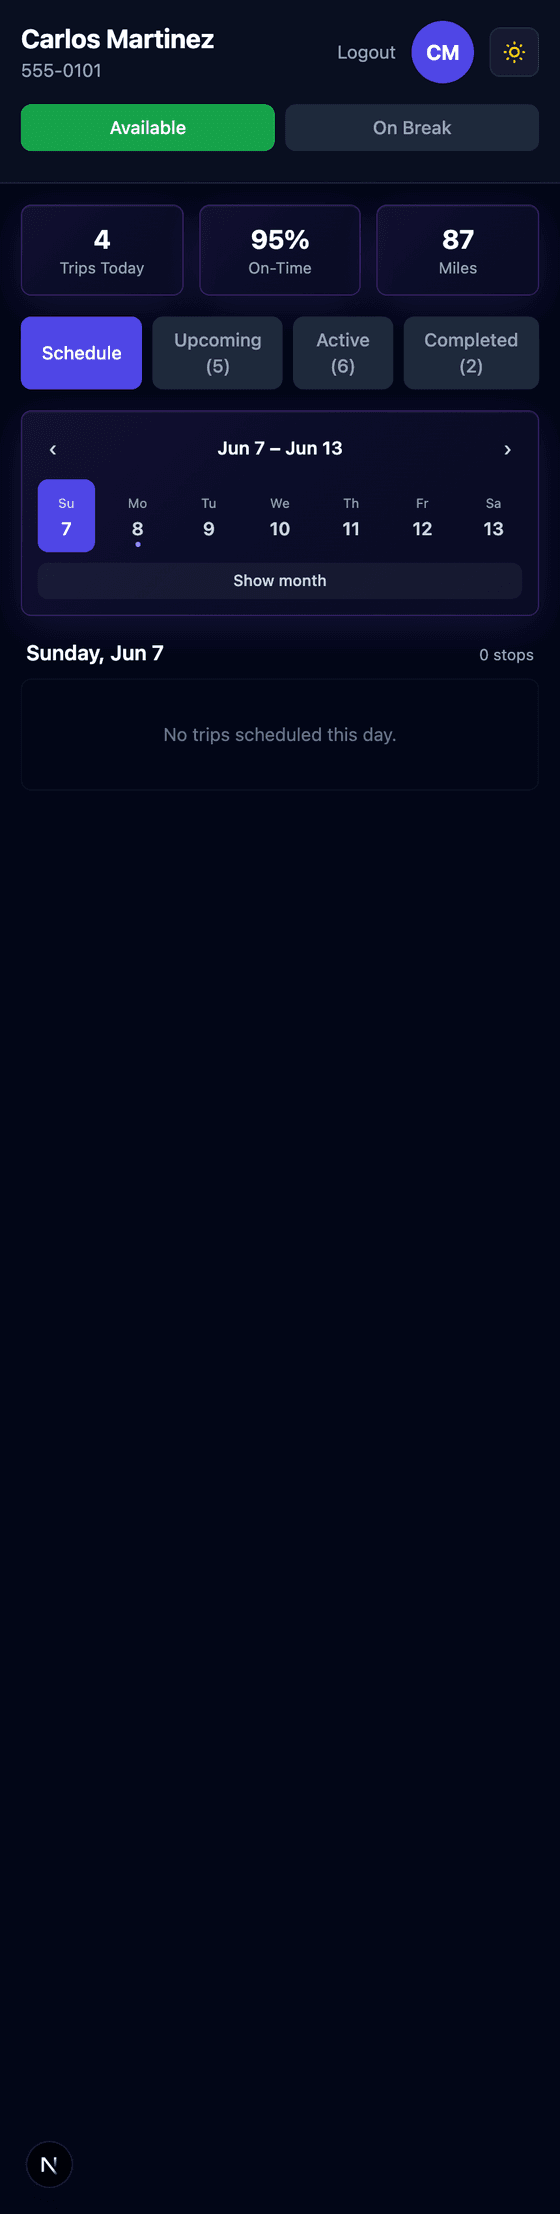
The Schedule tab gives drivers a calendar of their routes. Pick any day — today or upcoming — to see that day’s stops in order with pickup and appointment times.
- In the driver app, tap the Schedule tab.
- Use the week strip or switch to the month view; days with trips are dotted.
- Tap a date to see that day’s route: numbered stops with pickup and appointment times.
Billing & broker proof
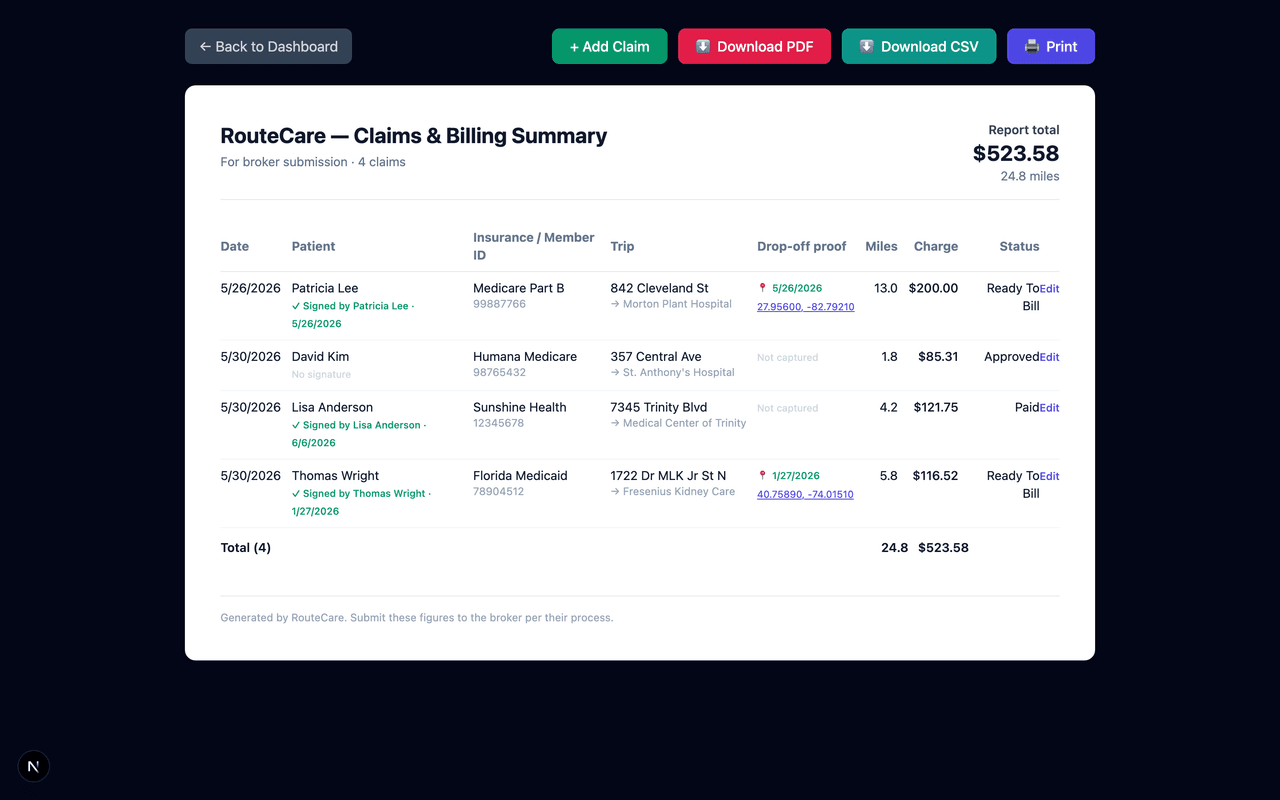
Completed trips roll into broker-ready claims. Each claim carries its proof — the passenger’s digital signature and the GPS-confirmed drop-off — so you’re covered when a broker asks.
- Open Billing from the nav. Each claim shows the charge, status, the signer’s name + date, and the GPS drop-off location/time.
- Add or edit claims as needed; totals update automatically.
- Download PDF for a clean, broker-ready report — or Download CSV for data, or Print.
Recurring trips (standing orders)
Set up recurring trips once — e.g. dialysis Mon/Wed/Fri — and generate them automatically.
- Open Recurring Trips from the nav.
- Add the passenger, pickup/drop-off, time, and the days of week plus a date range.
- Click “Generate” to create the upcoming trips. It’s safe to re-run — no duplicates.
Fleet, payouts & settings
Manage your team, vehicles, driver pay, markets, and your organization.
- Use Quick Actions to add passengers, vehicles, and drivers.
- In Settings → Organization, rename your company, copy your invite code, and set the timezone used for all trip times.
- In Settings → Driver Payout, choose either flat rates (per trip / mile / hour) or a percentage split of each trip’s broker charge.
- Admins can deactivate or restore dispatcher and driver access from Team access.
- In Settings → Data management, admins can bulk-delete passengers or trips when clearing test or duplicate data.
- Markets are ZIP-prefix groups saved in your browser and used by the Dispatch Market dropdown.
Passenger texts & live tracking
RouteCare keeps riders in the loop automatically with “Where’s My Ride” texts and a live tracking link — no more confirmation calls.
- When a driver starts toward pickup, the passenger gets an automatic “on the way” text.
- When the driver arrives at pickup, the passenger gets an automatic arrival text.
- The text includes a tracking link the passenger can open with no login to see status.
- A rider who replies STOP is opted out and will not receive future ride texts.
Add RouteCare to a phone home screen
RouteCare is a web app, but it can be installed from the browser so dispatchers and drivers can open it like a normal phone app.
- On iPhone, open RouteCare in Safari, tap Share, then tap “Add to Home Screen.”
- On Android, open RouteCare in Chrome and use the browser’s Install app or Add to Home screen option.
- Dispatchers who install from the main app open RouteCare normally. Drivers who install from /driver get the Driver app name/icon and open straight to their trips.
- The app registers a service worker so the installed shell can open reliably even when the network is briefly unavailable.
Still need help? Contact your administrator.